This time we tortured a very popular smartphone: the iPhone 4S. We hesitated for some time but finally decided to test it despite the fact that it looks absolutely like its antecedent – the iPhone 4 that we reviewed in September 2010. By the way, currently we perform our tests in a little bit different way and even included some more damaging experiments that the iPhone 4 luckily evaded.
As usual, we used two phones(!) of the iPhone 4S model. In fact, their package boxes don’t differ much from the one that we got with the iPhone 4 (Pic. 1). The accessories are also the same (Pic. 2). If you compare visually the iPhone 4S and the iPhone 4 from the front and from the back you won’t find any differences (Pic. 3, 4). But if you look at their edges you’ll definitely notice that the iPhone 4S’s steel band is divided into 4 sections of the same size (Pic. 5). The middle edges are also different (Pic. 6). The assemblers of the iPhone 4S used the other screws. So these smartphones are not 100 % similar in appearance.
Results
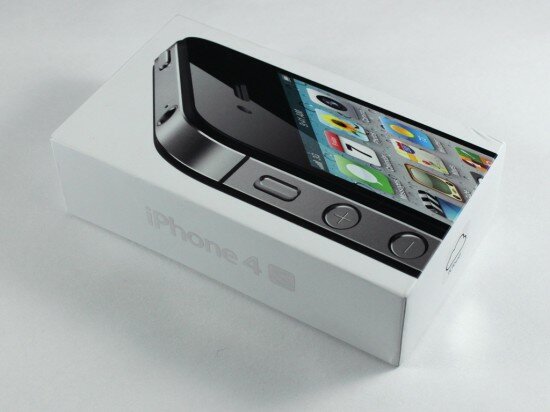
Pic. 1. Package box
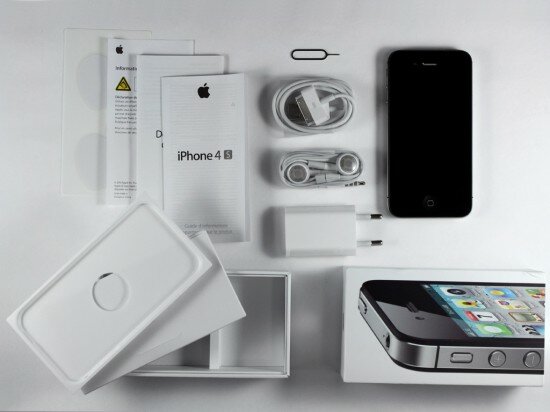
Pic. 2. Accessories
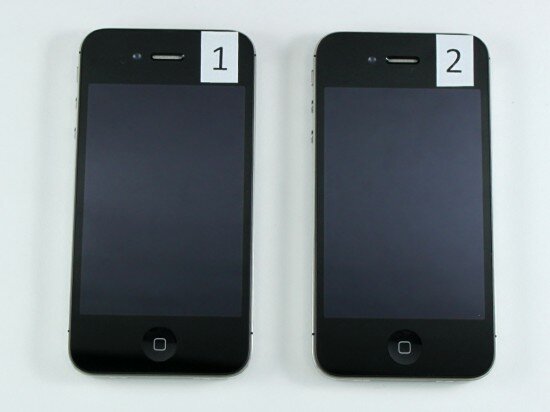
Pic. 3. The front panel
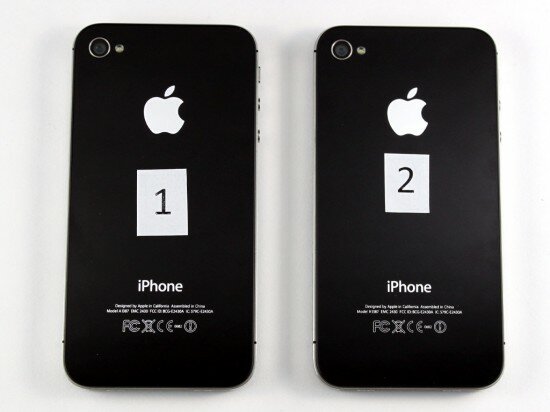
Pic. 4. The back panel

Pic 5. Here
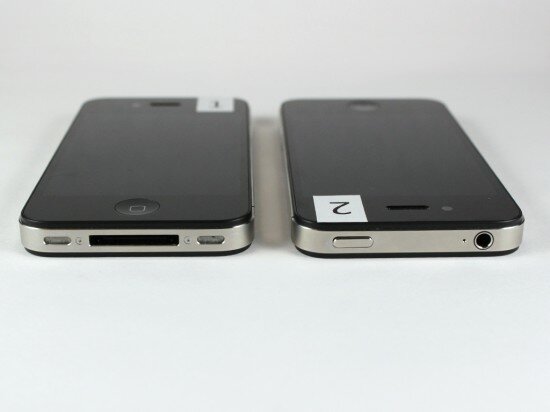
Pic. 6. The middle edge of the iPhone 4S
The 1st iPhone 4S stress tests
1. Reception quality test
Before performing dangerous experiments with the iPhone 4S we checked how fine this phone receives calls. We used a plain cardboard box, applied some glue all over it and pasted aluminum foil rectangles over all the surfaces of the box. Then we cut a 40 mm by 50 mm slot (1.57-inch by 1.97-inch) into the top of the lid and put the handset through the slot inside this box.
The box served as an obstruction for the signal from towers. The signal could be received only through the slot. When we made a call from another phone trying to get through to the iPhone 4S, the signal indicator on its screen displayed all the bars and it started ringing. It means that the call was received by the iPhone 4S. But we decreased the dimension of the slot to 20 mm by 20 mm (0.787-inch by 0.787-inch) and the signal reception fell by 2 points. Nevertheless, the iPhone 4S received all incoming calls with no problem.
Finally, we reduced dimension of the slot to 15 mm by 15 mm (0.59-inch by 0.59-inch) and the indicator of signal strength displayed only 1 – 3 bars. We made 10 calls in such conditions. The iPhone received only 7 of them.
You may check out all the stages of this test (video 1 – 3). The iPhone 4S showed worse result than the iPhone 4 which successfully received all incoming calls in poor reception conditions.
Video 1. Reception quality test (stage 1)
Video 2. Reception quality test (stage 2)
Video 3. Reception quality test (stage 3)
Grade (stage 1): 3 (with 3 being the highest possible grade)
Grade (stage 2): 3 (with 3 being the highest possible grade)
Grade (stage 3): 2 (with 3 being the highest possible grade)
2. Freeze test
As you know, cold temperatures may have a bad impact on electronic devices. But we take our mobile phones with us in any weather. And we don’t care about a battery capacity. We also never think about the state of a display or a keyboard that start to malfunction because of the frost. All we need is our iPhone 4S with us.
In order to check how fine this smartphone performs in cold weather, we placed it in a freezer for 2 hours. The handset was left there in speaking mode during that time. Then we planned to turn the phone to the stand by mode and leave it in the freezer for 30 minutes more. But the iPhone 4S switched itself off less than in an hour. We took it out and turned it on.
However, there was a very serious problem. The phone switched itself off every time when it started connecting to the mobile network. Evidently, the battery was damaged by frost. By the way, the temperature was -15 °С (5 °F) in the freezer. The battery simply couldn’t power the handset when it started to receive signal. It is strange but the battery stayed full after this test. The display and the keyboard worked fine.
To compare the scores of the iPhone 4S and the iPhone 4 in this test we should say that the older model is much better. The iPhone 4 showed perfect results. It worked with no problem during the whole experiment and its battery capacity was 87 %.
Video 4. Here’s how the iPhone 4S looks like after the freeze test.
Grade: 1 (with 3 being the highest possible grade)
3. Short circuit of the battery charger
In the following four chapters we are going to tell you about the experiments that we performed in order to check the work of the iPhone 4S electronic circuit. We started with the test of the battery charger (video 5). Actually, we connected the terminals of the charger together for a second. Despite the short circuit, it stayed absolutely functional. The phone worked fine with this charger plugged in.
Video 5. Short circuit of the battery charger
Grade: 3 (with 3 being the highest possible grade)
4. Short circuit of the battery
We removed the 2 screws from the middle edge of the phone, took off the back cover and shorted the phone’s battery (video 6). We saw a spark but the battery stayed functional and the handset performed with no problem.
Video 6. Short circuit of the battery
Grade: 3 (with 3 being the highest possible grade)
5. Voltage increase by charging up the phone
In this test, we tried to increase voltage to 8 V by charging up the phone with the help of the power supply. We wanted to simulate what might happen if a person uses another charger instead of the one that goes with the iPhone 4S.
As we were able to control the rate of voltage, we tried to increase it (video 7). 8 V was our final point. However, the iPhone 4S stopped to consume power when we reached 5,4 V (we started to raise the voltage from 5 V). This is a very good result!
Video 7. Voltage increase by charging up the phone
Grade: 3 (with 3 being the highest possible grade)
6. Providing the phone with extremely high power
This test was a real , the model of older generation. But what will happen with the iPhone 4S?
We lifted the battery out of its compartment and plugged the power supply in the phone instead. Then we tried to increase voltage to 7 V. However, the iPhone 4S was ready for this trick. It switched itself off and we could turn it on only with its own battery inside it. In other circumstances the handset simply didn’t work. It was a success! The HTC Desire performed the same way in this test and deserved the highest grade. We are glad to put the same grade for iPhone 4S.
Grade: 3 (with 3 being the highest possible grade)
7. Leaving the phone out in the rain
The next 6 chapters are devoted to water tests. Actually, we are going to damage the iPhone 4S by throwing it in water and in beer. But at first, we tried to ruin this gadget with the steam from a shower (video 9). This experiment lasted for 1 minute.
It seemed that our device successfully passed this test (Pic. 7). We checked the touchscreen immediately and it worked with no problem. But then we unfortunately found out that the speakers and the microphone didn’t produce any sound because they got wet. We removed drops of water from the speaker grill and dried the phone a little. All the problems with the sound were solved.
The charger jack got wet too (Pic. 8). Nevetheless, the handset worked fine with the charger plugged in. Then we noticed a water spot on the display (Pic. 9). We dried the phone for an hour but it didn’t help much. There was nothing to worry about because this is not a very serious problem. Such water spots always disappear in a couple of days. We couldn’t wait and performed the other test under the plan.
Video 8. Leaving the phone out in the rain
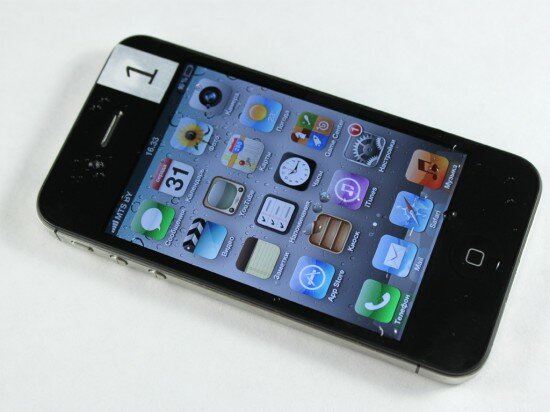
Pic. 7. Here
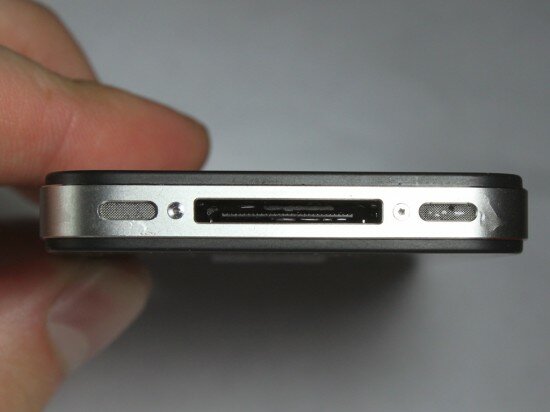
Pic. 8. Water in the charger jack
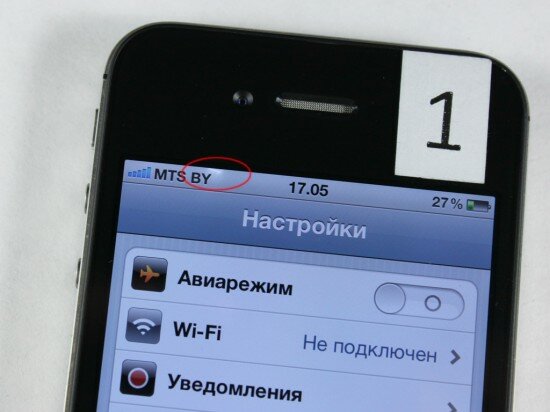
Pic. 9. The water spot on the display
Grade: 3 (with 3 being the highest possible grade)
8. Submerge in water
In this test we submerged the iPhone 4S in water for 20 minutes (video 10). The depth was very little and the phone sustained no damage.
Video 9. Submerge in water
Grade: 3 (with 3 being the highest possible grade)
9. Submerge of the iPhone 4S in water to one meter (3.28 feet) for 20 seconds
In this test we submerged the iPhone 4S in water to one meter (3.28 feet). Actually, we placed the phone in a long pipe filled with water and left it there for 20 seconds (video 10).
The handset stayed in speaking mode during the whole experiment. In a minute after the test the iPhone 4S switched itself off. We tried to turn it on several times but in vain.
In such cases it is required to lift the battery out but we decided not to remove the back cover and simply dried the phone with warm air for 12 hours. Unfortunately, the handset didn’t work as fine as before. We could turn it on only with the battery charger plugged in. The iPhone 4S switched itself off every time when we unplugged the charged from the jack.
Besides, there were some tiny spots on the screen – the impact of water on the phone. This is how our first iPhone 4S was completely damaged by water. We couldn’t use this smartphone any more.
Video 10. Submerge of the iPhone 4S in water to one meter
Video 11. This is how the iPhone 4S worked after this test
Grade: 1 (with 3 being the highest possible grade)
10. Submerge of the iPhone 4S in water to one meter for 30 minutes
Only IPx1-IPx6 waterproof cell phones are eligible for this test.
Grade: –
11. Submerge of the iPhone 4S in water to two meters
Only IPx7 waterproof cell phones are eligible for this test.
Grade: –
12. Immersion in beer
As the first iPhone 4S was completely damaged by water, we used the other one in our test with beer. By that time our second iPhone 4S had passed several experiments. In one of them the phone’s screen was cracked. In order to prepare the handset for immersion in beer we pasted a piece of scotch tape on the screen. Then we denked the gadget under beer for 10 seconds (video 12).
It’s not a secret that beer can ruin any smartphone, especially those with capacitive touchscreens. They simply become useless. But if you wash them with water and dry for a few hours, they always get better. The same happened with our iPhone 4S. The touchscreen malfunctioned greatly after the test. But soon we managed to remedy all the problems.
Video 12. Immersion in beer
Grade: 2 (with 3 being the highest possible grade)
13. Disassembling. Build quality
Now let’s go back to our first iPhone 4S that was completely damaged by water. We disassembled this smartphone in order to have a look at its innards and build quality. By the way, it was very interesting to find some new elements that weren’t included in the phone of the previous generation. Actually, we noticed many differences between these models. Check out picture 10 and you’ll see the antenna. As you remember, the antennas of the iPhone 4 are built into the stainless steel band that runs around the phone. Many people didn’t feel comfortable using this handset while speaking because sometimes it loses signal from towers when a person touches both antennas with his/her fingers.
The designers of the iPhone 4S decided to hide the GSM/3G antennas inside the phone in order to evade this problem. But at the same time such design didn’t let the iPhone 4S show fine results in our reception tests. As for the Wi-Fi antenna, it is built into the middle edge of the handset.
The build quality of the iPhone 4S is perfect. The manufacturers deserve a lot of praise (Pic. 11). They took into account every small detail and put it in its proper place in the phone. Most of the innards are removable. You can repair or replace them with no problem in case of a damage.
The circuit board looks perfectly made. It has the same shape as the circuit board of the iPhone 4 (Pic. 12, 13). But its design is a little bit different.
The circuit board of the iPhone 4S contains 11 cables. There are no unnecessary spaces or details. Every component occupies its own place and fulfils its duty.
Check out picture 14 and you’ll see the rear side of the phone’s battery. Among the chinese hieroglyphs you may notice that the battery capacity is 1430 mAh. Mind that you won’t find such information on the official website.
You may also have a look at the phone’s camera on picture 15.
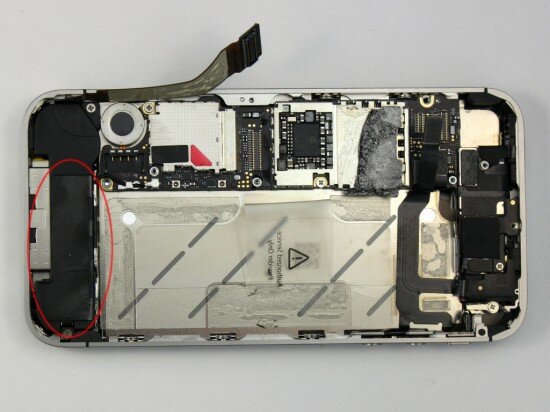
Pic. 10. The phone with the removed back cover
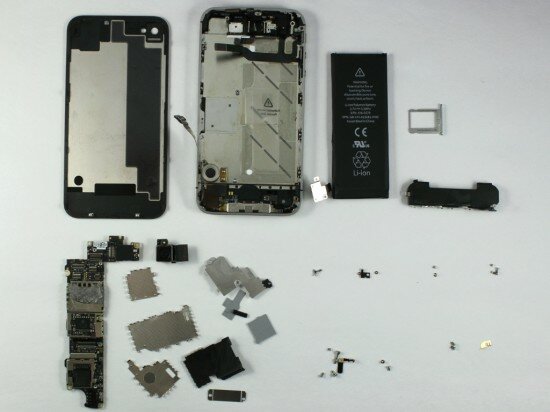
Pic. 11. The phone disassembled
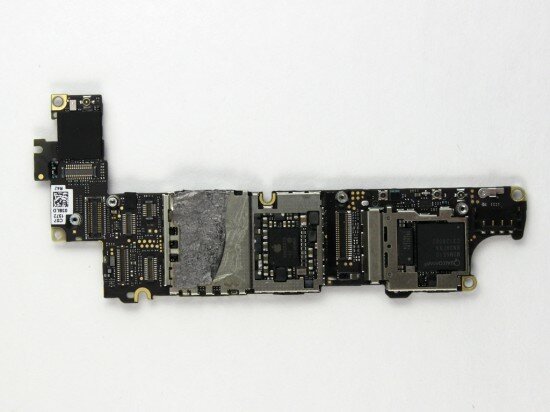
Pic. 12. The circuit board
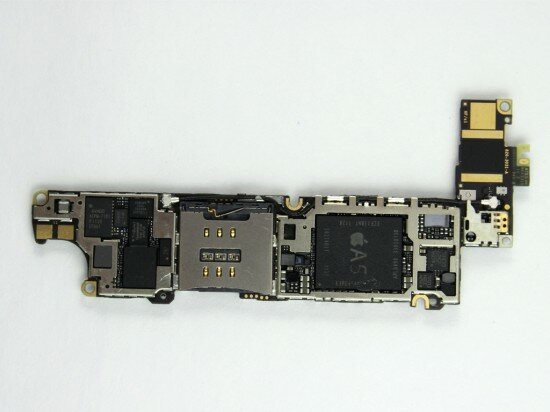
Pic. 13. The rear side of the circuit board
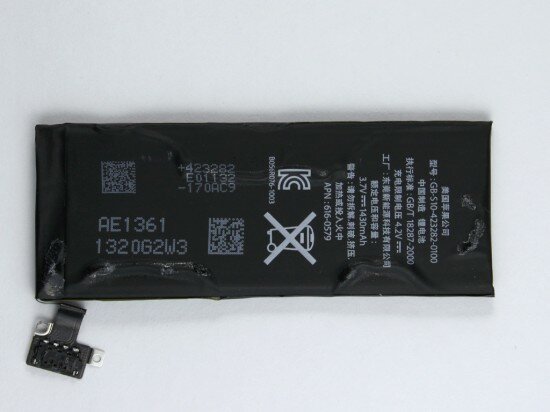
Pic. 14. The battery of the iPhone 4S
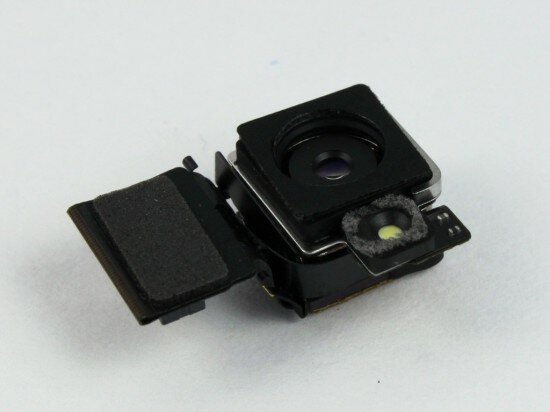
Pic. 15. The camera of the iPhone 4S
Grade: 3 (with 3 being the highest possible grade)
14. Test of the headphone cable (bend test)
Headphones short out because of a tear in the wire. It happens with any of them sooner or later if you listen to music on your mobile phone. In this test we tried to check reliability of the headphones that comes with the iPhone 4S. We locked the cable in a special device which bended different areas of the wire many times (video 13).
We divided this test into 3 stages according to the number of bends: 1000, 1500 and 2000 bends. We examined the state of the headphones after every stage. As a result, the headphones sustained no damage and stayed functional.
Video 13. Test of the headphone cable (bend test)
Grade (stage 1): 3 (with 3 being the highest possible grade)
Grade (stage 2): 3 (with 3 being the highest possible grade)
Grade (stage 3): 3 (with 3 being the highest possible grade)
15. Test of the headphone cable (strain of the wire)
Strain of the wire is the 2nd test that we prepared for the headphones. We pulled the cable like a string and hung the three loads on it (video 14). Every of them weighed 1 kg (2.2 lbs).
The 3kg load didn’t tear the wire and the headphones stayed functional.
Video 14. Test of the headphone cable (strain of the wire)
Grade (stage 1): 3 (with 3 being the highest possible grade)
Grade (stage 2): 3 (with 3 being the highest possible grade)
Grade (stage 3): 3 (with 3 being the highest possible grade)
Our second iPhone 4S stress tests
1. Reception quality test
The first iPhone 4S didn’t receive all the calls that we made. But we tested the other iPhone 4S the same way in order to be sure in the results shown the previous time. We used the same box and the same lids with the slots cut into the top of them.
The second iPhone 4S showed nothing new. The phone didn’t receive all incoming calls when the dimensions of the slot were 15 mm by 15 mm (0.59-inch by 0.59-inch). However, the signal indicator displayed two bars at that time. So we can infer that the information shown on the phone’s screen is not always reliable.
Grade (stage 1): 3 (with 3 being the highest possible grade)
Grade (stage 2): 3 (with 3 being the highest possible grade)
Grade (stage 3): 2 (with 3 being the highest possible grade)
2. Talk time
We already know that the battery capacity of the iPhone 4S is 1430 mAh. The manufacturer insists that when the battery is full, the talk time is up to 8 hours on 3G and up to 14 hours on 2G (GSM). But we checked it!
First of all, we charged the iPhone 4S to 100% battery. Next, we used another handset to make a call over 3 G. We answered this call and left the iPhone 4S in speaking mode. We had to repeat all of this every hour because mobile operators disconnect subscribers after an hour of talk.
We are glad to declare that the iPhone 4S talk time is 9 hours and 50 minutes which is much greater than the figures stated on the website. But you should take into account that we performed this test in strong reception conditions. A weak signal from towers may decrease the talk time of your smartphone.
Grade: 3 (with 3 being the highest possible grade)
3. Drops on the carpet
This trouble may happen to any mobile phone. There are no people who never dropped their handsets. In such situations it is very important on what surface the phone lands.
We started with drops on the carpet. The iPhone 4S fell with each face, edge and corner from 100 cm (3.28 ft), 150 cm (4.9 ft) and 200 cm (6.56 ft) (video 15 – 17). Despite the wallop, the handset showed no visible damage and stayed functional.
Video 15. Drops on the carpet from 100 cm (3.28 ft)
Video 16. Drops on the carpet from 150 cm (4.9 ft)
Video 17. Drops on the carpet from 200 cm (6.56 ft)
Grade (stage 1): 3 (with 3 being the highest possible grade)
Grade (stage 2): 3 (with 3 being the highest possible grade)
Grade (stage 3): 3 (with 3 being the highest possible grade)
4. Drops on a tile
In this test we dropped the iPhone 4S on a tile from 30 cm (11.8 inches), 50 cm (1.64 ft) and 100 cm (3.28 ft) (video 17 – 19). This time the handset got some scuffs on the middle edge (Pic. 16). However, it worked pretty fine.
Video 18. Drops on the tile from 30 cm (11.8 inches)
Video 19. Drops on the tile from 50 cm (1.64 ft)
Video 20. Drops on the tile from 100 cm (3.28 ft)
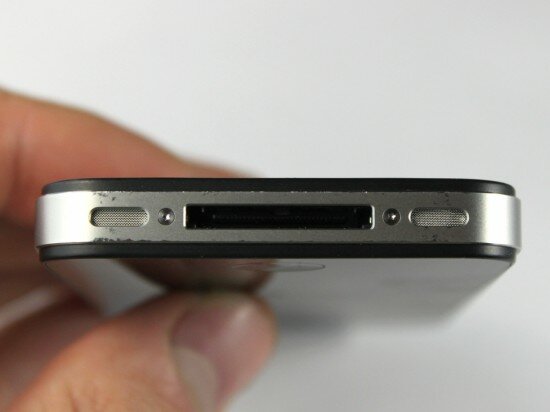
Pic. 16. Scuffs on the middle edge
Grade (stage 1): 3 (with 3 being the highest possible grade)
Grade (stage 2): 2 (with 3 being the highest possible grade)
Grade (stage 3): 2 (with 3 being the highest possible grade)
5. Squeeze test
In this test we placed a wooden bar on the iPhone 4S and applied pressure from this bar above the device. At first we applied 5 kg (11 lbs), then 20 kg (44 lbs) and finally 50 kg (110 lbs) (Pic. 17).
The handset didn’t sustain any damage due to its flat shape.
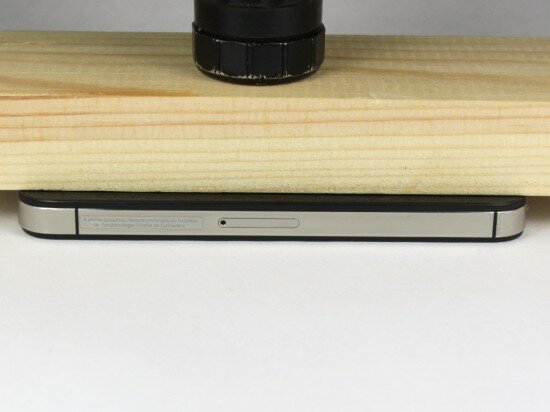
Pic. 17. Squeeze test
Grade (stage 1): 3 (with 3 being the highest possible grade)
Grade (stage 2): 3 (with 3 being the highest possible grade)
Grade (stage 3): 3 (with 3 being the highest possible grade)
6. Bend test
We put the iPhone 4S onto the two planks to each edge of the phone lay on a single plank. Then we hitched a string with 3, 7 and 15 kg loads on top of the device (6.6, 15.4 and 33 lbs). Fortunately, the phone is solid due to the high quality of the assembly and due to the stainless steel band that runs around the casing. Based on picture 18, the iPhone 4S sustained no sign of bend.
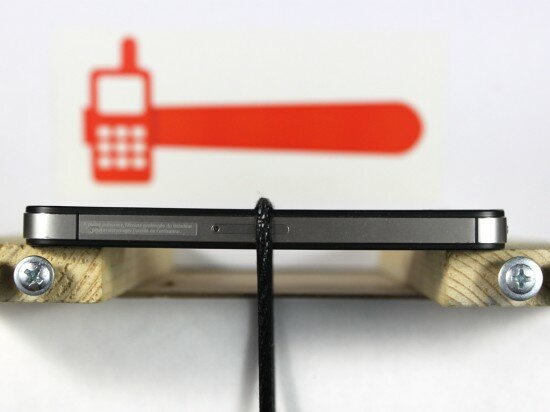
Pic. 18. The iPhone 4S with the 15 kg load
Grade (stage 1): 3 (with 3 being the highest possible grade)
Grade (stage 2): 3 (with 3 being the highest possible grade)
Grade (stage 3): 3 (with 3 being the highest possible grade)
7. Test of the keys
We can’t complain about the keys of the iPhone 4S because they worked with no problem even after the water and beer tests. Cold weather is not a trouble for the buttons. They are made of the high quality material and set deep and quite difficult to loosen. All the keys give you an amazing tactile feedback and it’s a pleasure to used them.
Grade: 3 (with 3 being the highest possible grade)
8. Dust and sand
We placed the iPhone 4S in an enclosed tray containing dust and sand. Then we made it vibrate viciously for 1, 3 and 6 minutes. We examined the state of the phone after every period of the test (video 21).
The handset looked pretty fine after 1 minute of vibration in the tray (Pic. 19). The exposed charger jack was clean (Pic. 20). When we rotated the tray for the second time the loudspeaker grill got dirty but we cleaned it with no problem (Pic. 21). Some grains of sand penetrated the vibrate switch but it worked fine anyway (Pic. 22). The last 6 minutes in the tray didn’t left a very bad impact on the phone. We saw some dust in the seams between the power button and the housing and between the screen and the housing (Pic. 23). A few tiny grains of sand penetrated the SIM card slot (Pic. 24). Besides, the device sustained some scratches and scuffs on the panels and on the middle edge (Pic. 25, 26, 27). It didn’t influence the work of the phone.
Video 21. Dust test
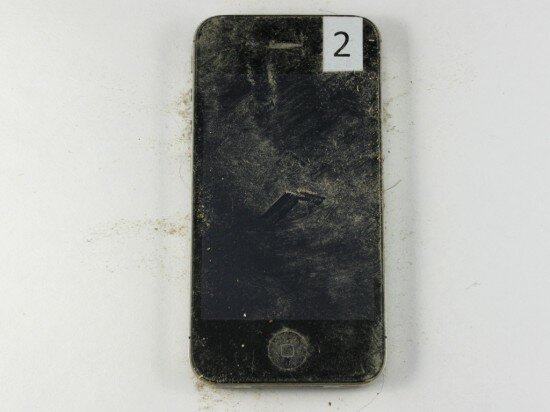
Pic. 19. Here
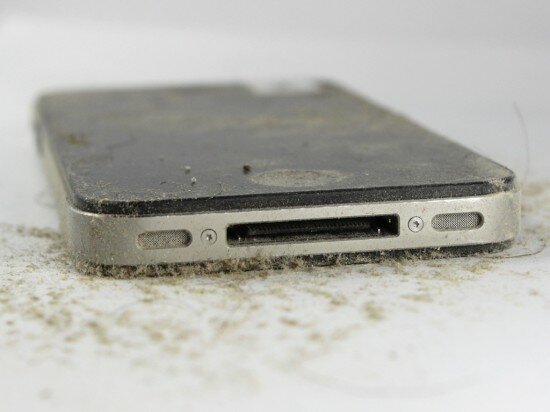
Pic. 20. The charger jack (the first stage of the test)
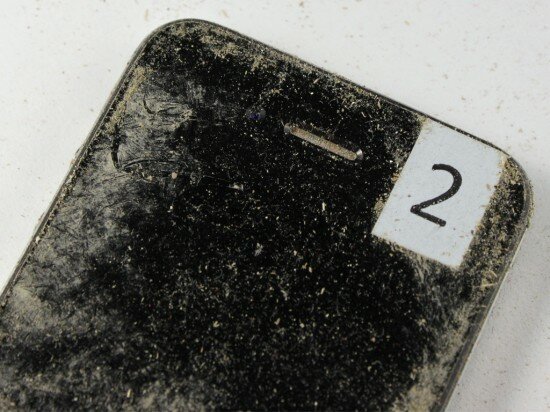
Pic. 21. The loudspeaker (the second stage of the test)
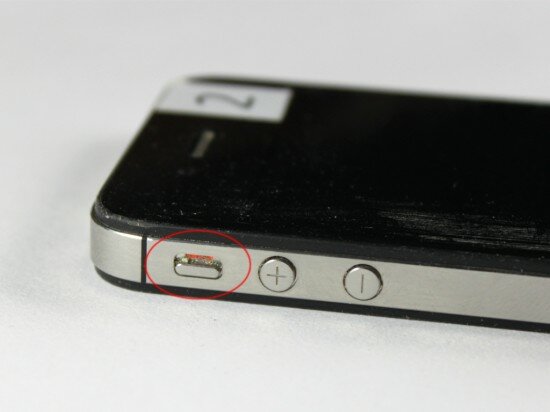
Pic. 22. Grains of sand in the vibrate switch (the second stage of the test)
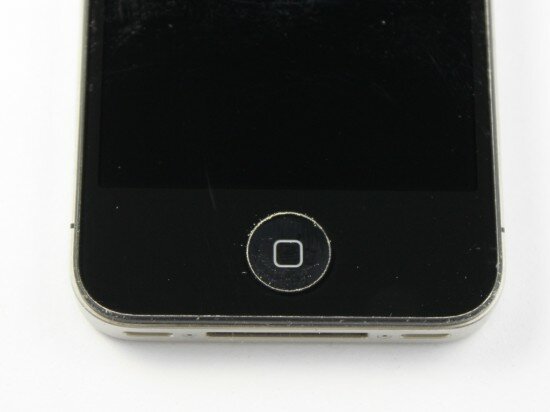
Pic. 23. Dust in the seams (the third stage of the test)
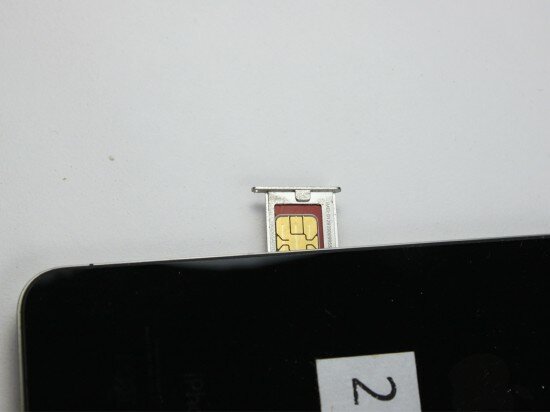
Pic. 24. Dust in the SIM card slot (the third stage of the test)
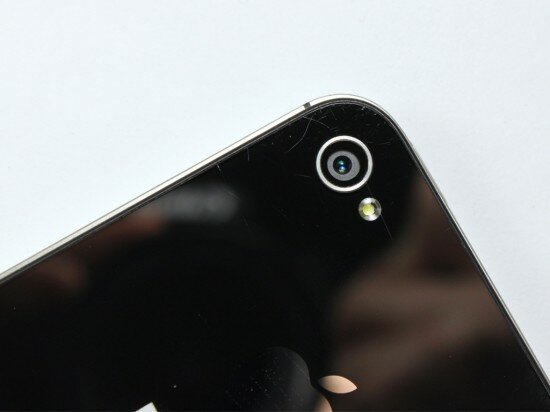
Pic. 25. Scratches on the back panel (the third stage of the test)
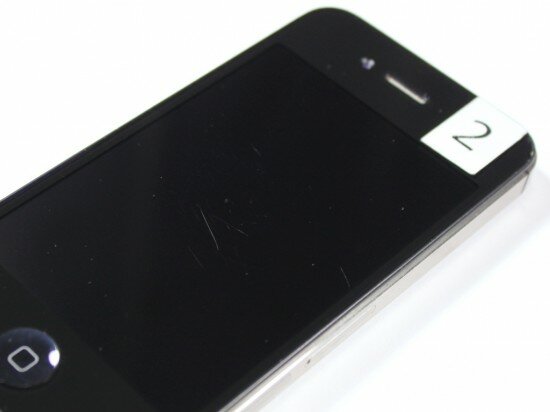
Pic. 26. Scratches on the screen (the third stage of the test)
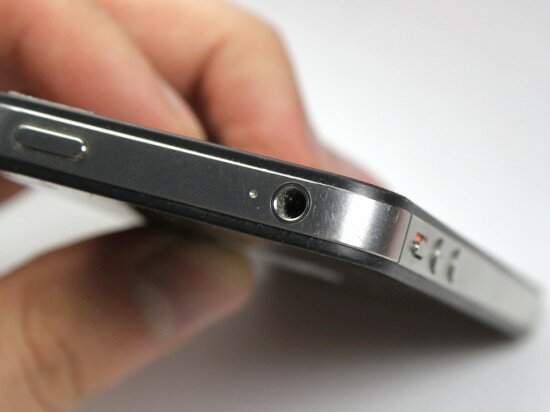
Pic. 27. Scuffs on the stainless steel band (the third stage of the test)
Grade (stage 1): 3 (with 3 being the highest possible grade)
Grade (stage 2): 3 (with 3 being the highest possible grade)
Grade (stage 3): 2 (with 3 being the highest possible grade)
9. Durability test
Any mobile phone easily gets scuffs and scratches if you rub it against a rough surface. We simulated such situation in this experiment. We took a tray, filled it with some small balls, sand and dust and placed the iPhone 4S there. After that we vibrated the tray slightly for three periods of time: 1, 3 and 5 hours. We checked the state of the phone after every stage of the test.
The handset looked pretty fine after the first part of the experiment. During the next 3 hours of vibration the screen got several scuffs that were seen only in the bright lights (Pic. 28). When the test was finished the screen sustained much more damage. But fortunately the picture wasn’t ruined because this damage was invisible with the switched backlight (Pic. 29).
Video 22. Durability test
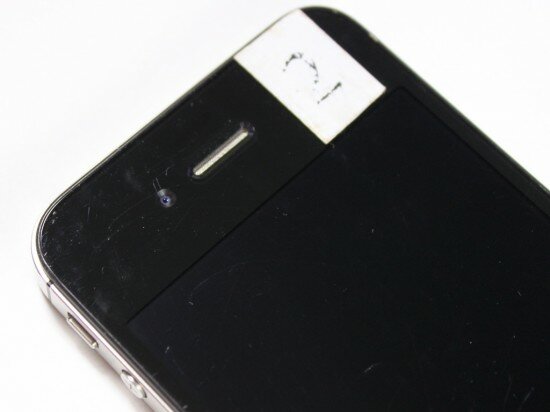
Pic. 28. Scuffs on the screen (the second stage of the test)
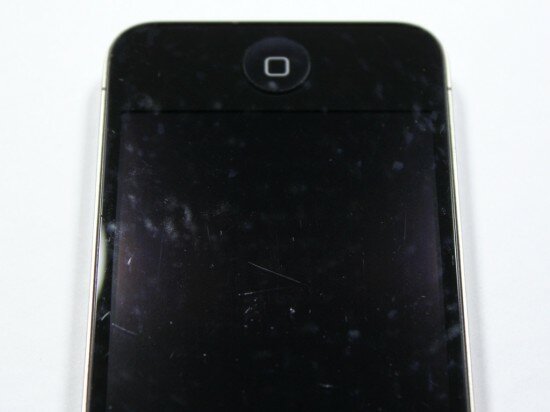
Pic. 29. Scuffs on the screen (the third stage of the test)
Grade (stage 1): 3 (with 3 being the highest possible grade)
Grade (stage 2): 3 (with 3 being the highest possible grade)
Grade (stage 3): 3 (with 3 being the highest possible grade)
10. Scratch test of the screen
We checked scratch resistance of the smartphone’s screen in a very simple way. In the video below you can watch how we scratched the handset for three times at the force of 100, 300 and 600 g (0.22, 0.66 and 1.3 lbs). However, we couldn’t make even a tiny scratch!
Video 23. Scratch test of the screen
Grade (the 1st attempt): 3 (with 3 being the highest possible grade)
Grade (the 2nd attempt): 3 (with 3 being the highest possible grade)
Grade (the 3rd attempt): 3 (with 3 being the highest possible grade)
11. Scratch test of the back panel
We scratched the back panel with a nail at the same force (video 24). But the phone showed no visible damage which means that it is made of a high quality material.
Video 24. Scratch test of the back panel
Grade (the 1st attempt): 3 (with 3 being the highest possible grade)
Grade (the 2nd attempt): 3 (with 3 being the highest possible grade)
Grade (the 3rd attempt): 3 (with 3 being the highest possible grade)
12. Screen glass attack
In this test we checked how the screen of the iPhone 4S is ready for accidental knocks and bumps. The phone was attacked by a steel ball that fell on its screen from different heights: 10, 20 and 30 cm (3.9, 5.9 and 9.8 inches). Check out the video below and be sure that the handset sustained no visible damage.
Video 25. Screen glass attack
Grade (stage 1): 3 (with 3 being the highest possible grade)
Grade (stage 2): 3 (with 3 being the highest possible grade)
Grade (stage 3): 3 (with 3 being the highest possible grade)
13. Heat test
As you remember, we left our first iPhone 4S in the freezer where it suffered greatly. As for the other iPhone, we did the opposite thing. We tried to simulate what might happen with the phone if you leave it in the sun on a hot summer day. Actually, the handset was placed in front of the two strong lamps (150 Wt each). Their light heated it for 3, 5 and 10 minutes (video 26, 27).
When we examined the phone during the experiment there was nothing to worry about. But when the whole test was finished we understood that the iPhone 4S overheated. The display became dim. When the picture of the screen was restored we saw a message that the phone needed chilling. We should say that the iPhone is the only device that is able to control overheating and warn about it. It’s a very intelligent gadget!
Video 26. 3-minute heating
Video 27. 10-minute heating
Grade (3-minute heating): 3 (with 3 being the highest possible grade)
Grade (5-minute heating): 3 (with 3 being the highest possible grade)
Grade (10-minute heating): 3 (with 3 being the highest possible grade)
14. The iPhone 4S smash
By that time we already performed all the stress tests. That was the last one. We tried to smash the iPhone 4S not only for fun but also to find out how rugged it is.
We dropped the phone with each face, edge and corner on the tile from 150, 200 and 240 cm (4.9, 6.56 and 7.87 ft). Check out video 28 and 29.
At first, the handset sustained no visible damage. But after some drops from 200 cm the screen was broken (Pic. 30). Despite the crack, we could use the touchscreen with no problem. This is a very strong advantage of capacitive touchscreens. Among the other damages we can mention the slight deformation of the steel band that runs around the phone (Pic. 31). There was no point in dropping the iPhone 4S from greater height because we didn’t want to ruin it completely.
Video 28. Drops on the tile from 150 cm (4.9 ft)
Video 29. Drops on the tile from 200 cm (6.56 ft)
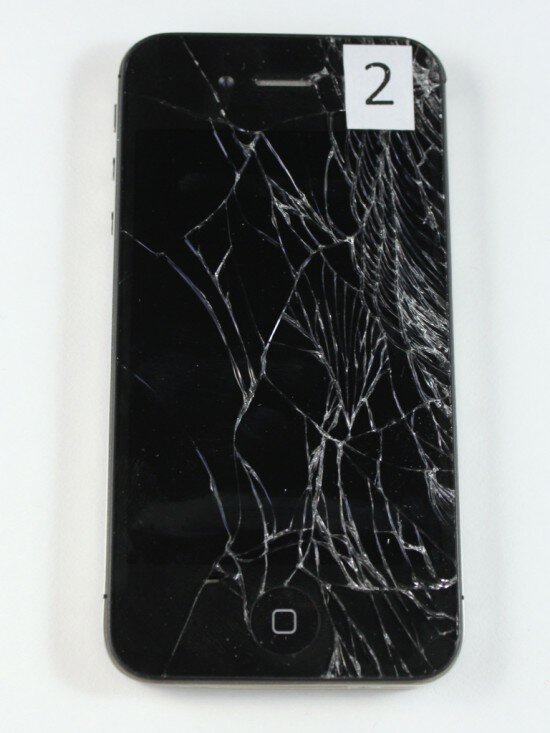
Pic. 30. The iPhone 4S with the cracked screen
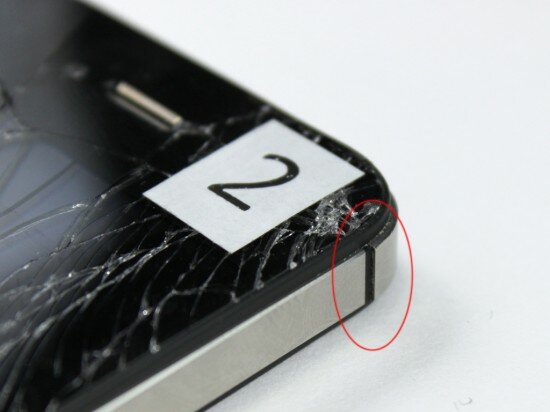
Pic. 31. Slight deformation of the steel band
Grade (150 cm (4.9 ft)): 3 (with 3 being the highest possible grade)
Grade (200 cm (6.56 ft)): 2 (with 3 being the highest possible grade)
Grade (240 cm (7.87 ft)): – (with 3 being the highest possible grade)
15. Disassembling. Build quality
At last, we disassembled our second iPhone 4S (Pic. 32). We saw a little coat of dust inside the phone. As for the rest, the phone deserves all the praise that we already gave in the first part of this review.
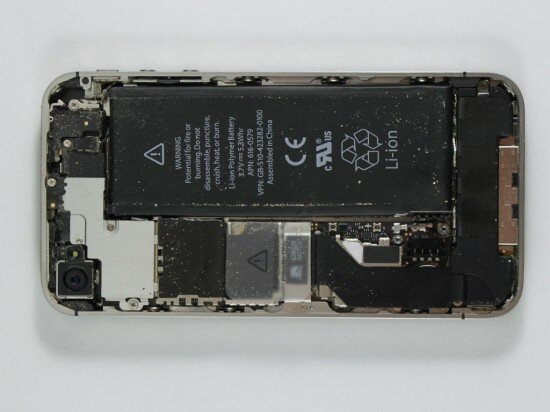
Pic. 32. Dust inside the iPhone 4S
Grade: 3 (with 3 being the highest possible grade)
All in all, the iPhone 4S gains 613 point (with 686 being the highest possible grade)
Final words
In spite of the fact that both iPhone 4S models became absolutely useless they got many points for the tests. It’s not easy to pinpoint all the disadvantages of this cult phone because there are objective reasons for its fails. It depends much on the handset’s design features. Don’t blame us in defending this phone. Nothing of the kind. Now we’ll try to give you some explanation.
As you know, our first iPhone 4S was damaged during the submersion in water to 1 m. All the problems could have been solved if we had removed the back cover and lifted the battery out. For example, the Nokia N8 (stress test Nokia N8) with a non-removable back panel started to malfunction immediately after we had dunked it under water to a little depth. The iPhone 4S showed much better performance in this respect.
The touchscreen is one of the weakest points of this smartphone. If there had been a steel band around the screen, the handset wouldn’t have got so much damage in the drop test. We think that the designers of the iPhone 4S didn’t add the steel band on purpose because they wanted to make the handset look more stylish. The only test that the iPhone 4S didn’t pass at all is the freeze test. Can you imagine that your handset switches itself off during a call when you take it out with you in cold weather? It’s terrible, isn’t it? The representative of older generation, the iPhone 4, is more reliable because it is not afraid of frost.
As for the other experiments, the iPhone 4S showed pretty high results. We should mention an immediate reaction of the phone to overheating and voltage increase. The programmers managed to create a very intelligent iOS that warns about all possible problems of the mobile. We should also admit that the handset is made of a high quality material which makes it very durable and even rugged. It’s clear that the iPhone 4S is not a scratch proof device. But in fact, it sustained much less physical damage in comparison with the other cell phones that we had ever tested.
Video 30. Here’s how both iPhone 4S models look like after all the stress tests
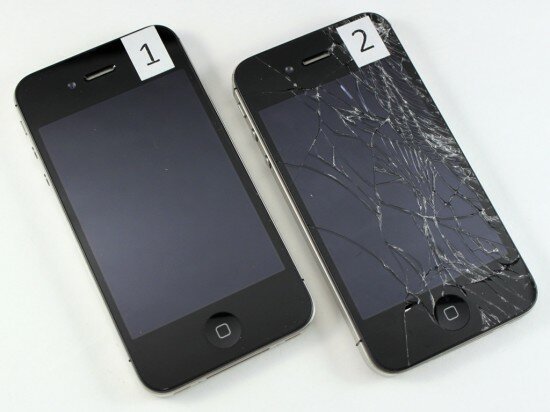
Pic. 33. The front side
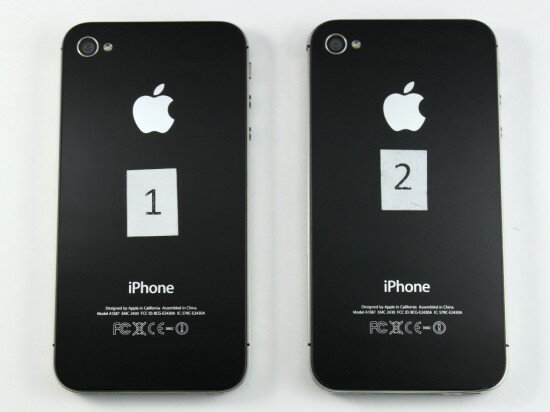
Pic. 34. The back side
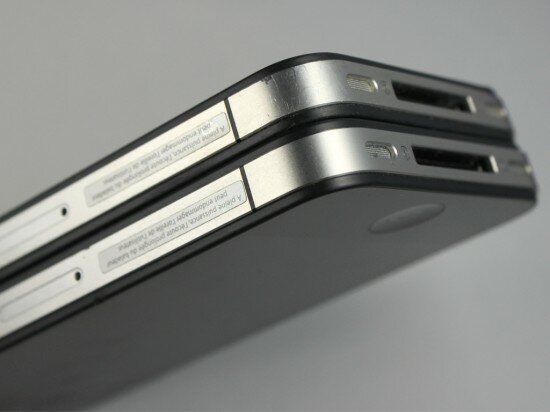
Pic. 35. The stainless steel band that runs around the phone
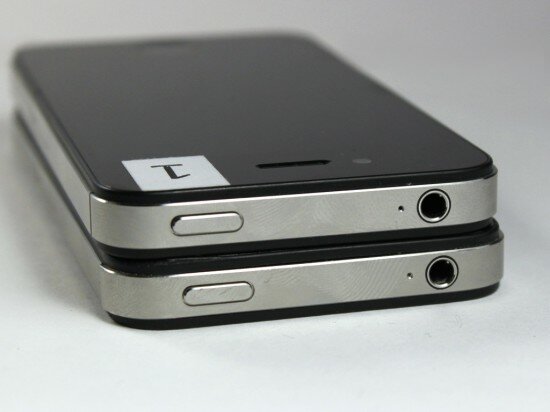
Pic. 36. The middle edge

 Russian version